Showing posts with label Recipes. Show all posts

Tuesday, February 2, 2021

Roasted Cauliflower

I'm really not a cauliflower fan, but I can eat it if it's covered in cheese, or mashed up and smothered in roast beef and gravy. But I found another delicious way of eating it and it's really easy. 


Just made this to add to a casserole I'm going to make later tonight and found myself munching on it like a snack - which is weird because I would never just munch on cauliflower or consider it a snack. But this is actually tasty.


I just chopped up a head of cauliflower, doused it in about 5 TBSP of melted Kerrygold butter, sprinkled it with garlic salt, onion powder, and paprika, and then baked it at 400 degrees for 15 minutes. Then I turned the oven to broil and broiled it for about 3 additional minutes, until some of the pieces started to brown. Yummy!

Saturday, January 23, 2021

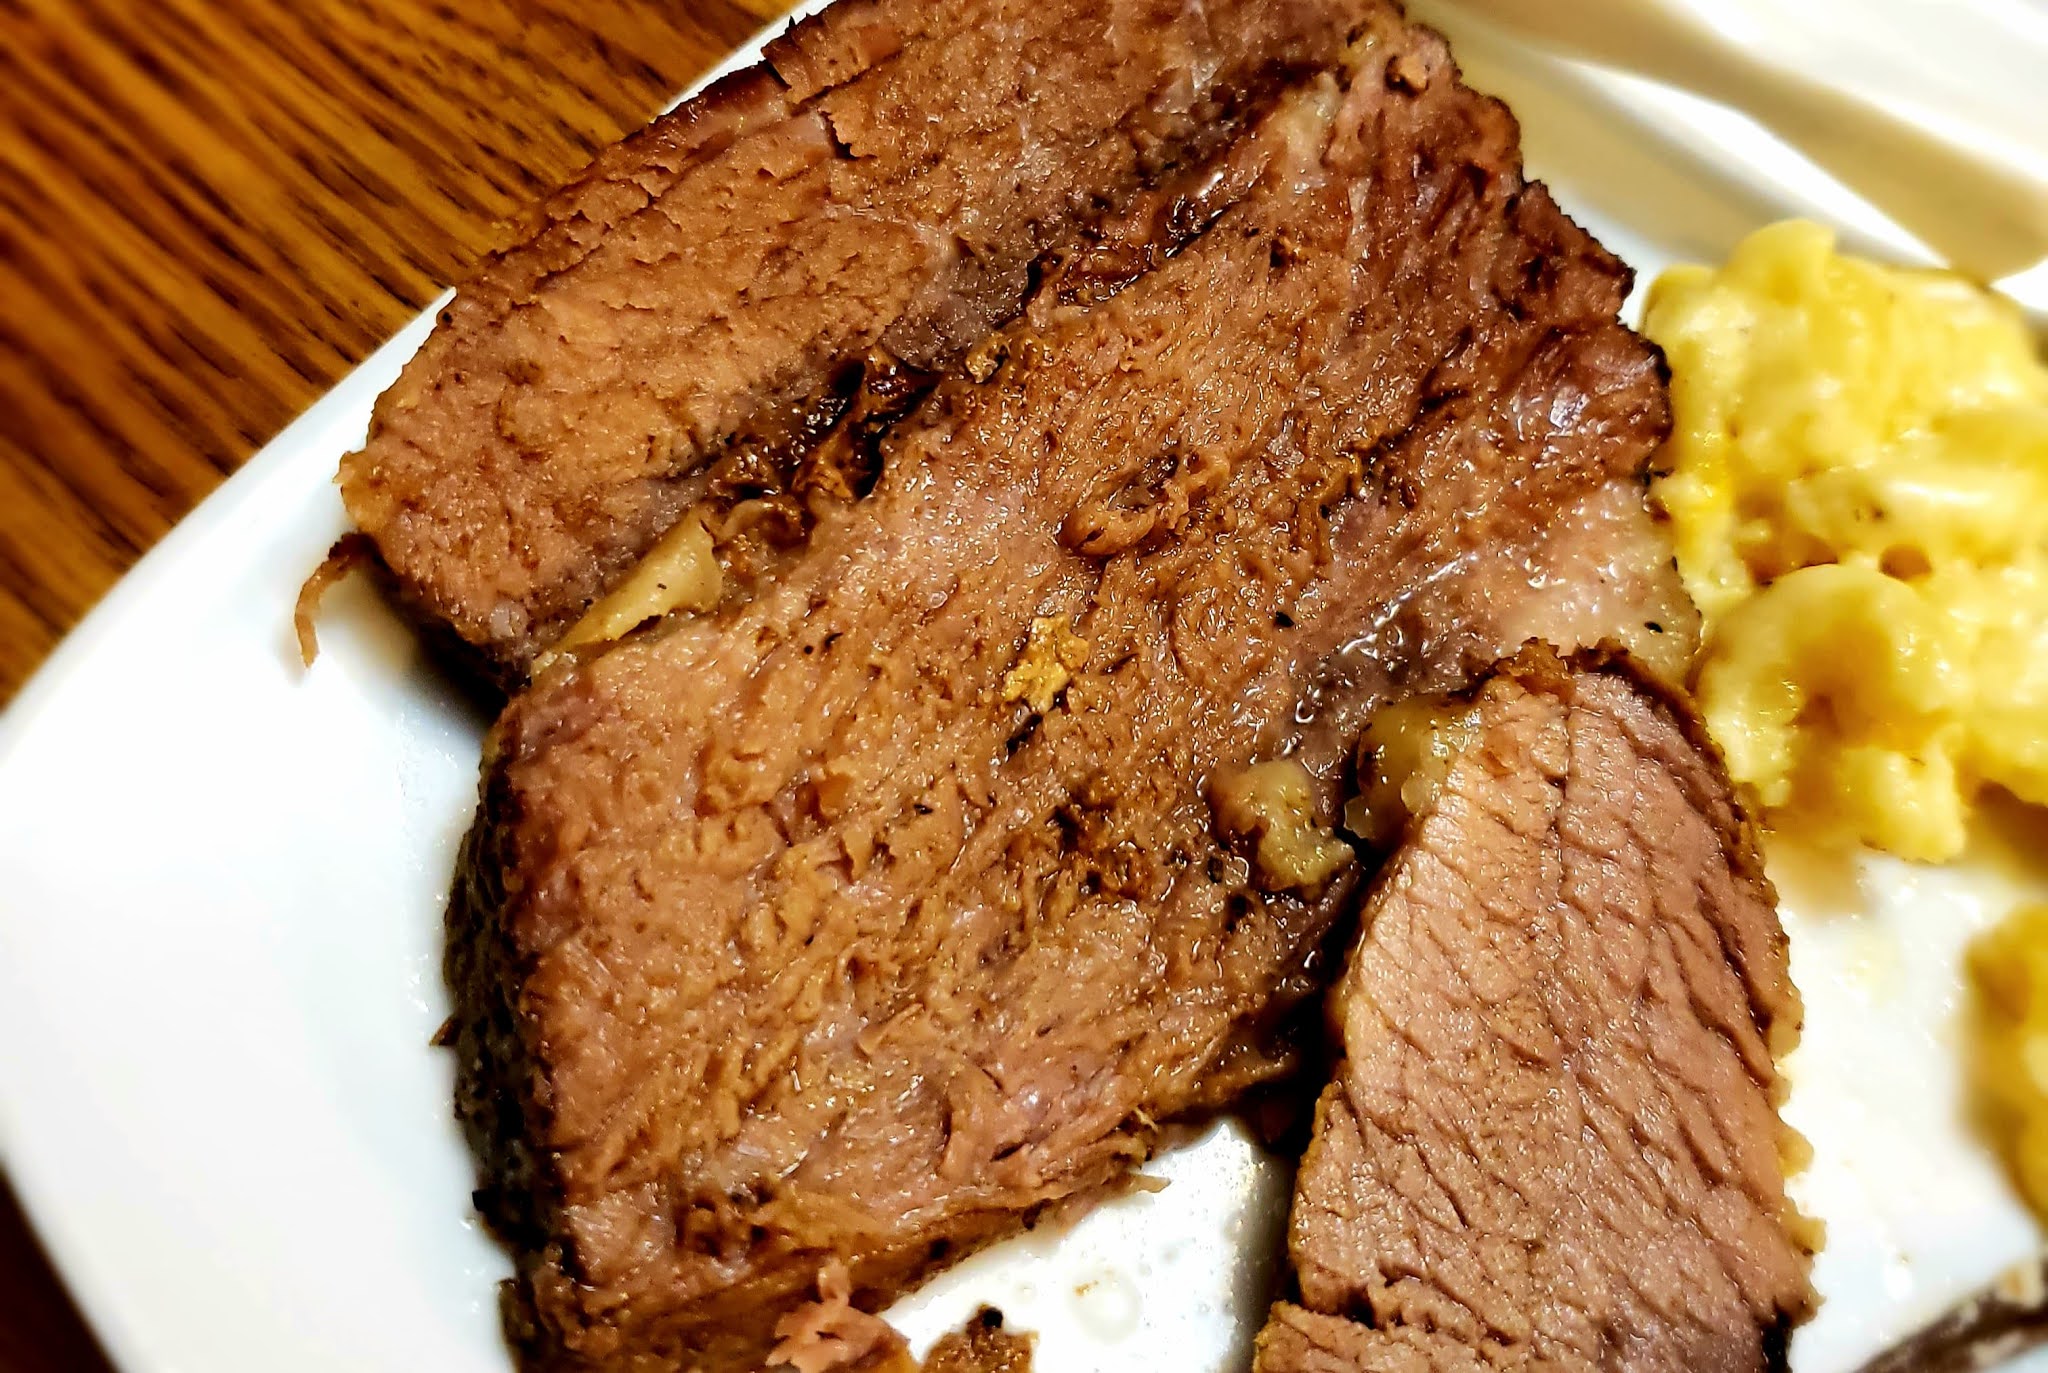
Brisket


I made brisket yesterday for Patrick's birthday. It was soooo good - probably the best brisket I've ever made. That might be because this time our brisket came from a local family farm and not the grocery store. I don't know why we don't have brisket more often, it is so delicious. Maybe because it's just so dang expensive. But it's completely worth it. I could just eat a plate full of brisket and nothing else. Who needs sides?

I need to write down how to do it because I am always forgetting. This is how my mom made it. She taught my friend how to make it, and I have had to email her more than once to ask, "How do you make my mom's brisket?" Ha. I shouldn't forget because it is about as simple as it could possibly be.

Ingredients:

  • Brisket, any size
  • Fiesta brand fajita seasoning
  • Water

Directions:

  1. Heat oven to 225 degrees F.  
  2. Place brisket, fat side down, in a baking pan and sprinkle generously with Fiesta brand fajita seasoning. Use tongs to hold the brisket on the sides and be sure to sprinkle the sides too. You can also rub the seasoning into the beef. 
  3. Now flip the brisket so the fat side is up and sprinkle that side. You will be cooking the brisket fat side up so the fat juices will melt and drip into the meat.
  4. Pour water into the pan so the brisket is sitting in about ½ inch of water.
  5. Cover the pan tightly with foil. 
  6. Bake for at 225 degrees for at least 1 hour per pound of brisket. A little longer doesn't hurt. I made a 4-pound brisket yesterday and set the timer for 4 hours. You can also bake it overnight at 200 degrees. Baste the brisket with the pan juices occasionally. You can turn the oven up during the last hour or so of cooking to speed things along. I made baked mac & cheese yesterday and turned the oven up to 400 for the last half-hour of cooking so that I could bake the macaroni in the oven with the brisket.
  7. Remove brisket from pan, place on a cutting board, and trim off any large pieces of fat. Now slice the brisket against the grain, or chop brisket for sandwiches.
  8. Transfer sliced brisket to a serving platter and pour a little of the pan juices on top. Serve with your favorite barbecue sauce, warmed. If you are serving chopped brisket, then mix it with a little barbecue sauce for serving.

It is actually delicious with no sauce, and it's zero carbs, of course!

Thursday, April 17, 2014

The Ultimate Tex-Mex Food: Cheese Enchiladas with Chili Con Carne


OK, today I am going to share with you how to make my absolute favorite Tex-Mex food ever. I love cheese enchiladas, and when they're topped with chili con carne....oh my goodness. The creamy, melty cheese...oozing from soft corn tortillas...smothered in spicy chili con carne...it doesn't get any better than that.


It's very simple and easy. The first thing you need to do is make some Texas chili, and my dad's recipe is the best (see link). Remember, there are no beans in Texas chili!! :) Chili con carne means "chili with meat." It is not chili con carne y frijoles.

My dad's Texas chili

These enchiladas are perfect to make if you have already made some Texas chili and have leftovers. Either freeze the chili and reheat it on the day you want to make enchiladas, or just make them the next day. I generally do not make the chili and enchiladas on the same day because the chili has to cook for a while, and if I'm assembling enchiladas for the whole family, it just takes too long. So, get out your Texas chili and heat it up.

The enchiladas are easy. Time-consuming (depending on how many you make), but easy! Start with some good corn tortillas (not flour!!). Heat a little oil in a small skillet over medium-high heat. When the oil is nice and hot, fry your tortillas, one or two at a time, (you can stack two and fry them together) for about 4-5 seconds per side. The oil should be hot enough to bubble up when you add the tortilla. Don't fry them too long - you're not making tortilla chips. You want them nice and soft and pliable.


Frying the tortilla in oil for just a few seconds makes them nice and soft and gives them an incredible flavor.

NOTE: Yes, you can heat your tortillas covered with a damp paper towel in the microwave, but I don't recommend it. Frying them adds so much flavor and they won't taste the same microwaved.

After frying your tortillas, just transfer to a plate in a stack. When they're cool enough to handle, lay some grated cheddar cheese down the middle, top with a bit of diced, sweet yellow onion, and roll up. Place the rolled tortillas in a baking dish.


Smother with steaming hot Texas chili, sprinkle with a little more cheese and chopped onion. Bake in 400 oven for about 12 minutes, until cheese is all melted.


It's easy to adjust the quantity of enchiladas you make. I only made two because I'm eating lunch alone. Enjoy!

Come see me at my new blog, www.StillAtHomeMom.com!


Friday, April 11, 2014

Meatless Lenten Friday: Vegetarian Chili

Well, it's the last day of Spring Break here, and Andy and I enjoyed a busy few days in Seattle with the girls. I have uploaded over 200 pictures on my computer and plan on posting about our mini-vacay soon, but since it's another Lenten Friday, I thought I would share my recipe for vegetarian chili.


I made this last Friday. My husband is always surprised when I remind him that there is no meat in it - I think the black beans give it that hearty, almost meaty flavor. I prefer black beans and pinto beans in my chili over kidney beans. However, if you like kidney beans, then feel free to replace any of the beans in this recipe with kidney beans!


VEGETARIAN CHILI

1 tablespoon olive oil

1 yellow onion, diced

1 green bell pepper, diced

2 cloves garlic, minced

1 can Rotel tomatoes

1 can diced green chilies

1 can (8 ounces) tomato sauce

1 can pinto beans with jalapenos (do not drain)

2 cans black beans, rinsed and drained

1 cup frozen corn, rinsed

1 jalapeno pepper, diced (remove seeds and membranes for less spice)

1/4 cup chili powder

1 teaspoon cumin

1 teaspoon dried Mexican oregano

1 teaspoon salt

1 teaspoon pepper

1 bay leaf

4 cups water

1/4 cup masa harina

Water

Diced avocado, sour cream, and shredded cheese, for serving (optional)

1. Heat olive oil in large pot over medium heat. Add onion and saute for about 5 minutes. Add garlic and saute for an additional 2 minutes.  Add Rotel tomatoes, tomato sauce, pinto beans, black beans, corn, jalapeno pepper, seasonings, salt, pepper, and bay leaf. Stir in water. Bring mixture to a boil, then reduce heat and simmer for 30 minutes. 

Drain and rinse black beans


Saute onions, bell pepper, and garlic.


I almost forgot the bay leaf! After adding masa harina, allow to simmer for at least one hour. Longer is better!


2. In a small bowl or cup, whisk together masa harina with some water to make a thin paste. The mixture should resemble the consistency of half n' half. Stir slowly into simmering chili, mixing well. Continue to simmer, covered, for at least 1 more hour.

My favorite way to eat vegetarian chili is simply topped with chopped avocado.

3. Serve with diced avocado, sour cream, and/or shredded cheese, if desired. Cornbread and a green salad also make excellent sides to serve with this chili. Enjoy!

Tuesday, April 1, 2014

Pasta Salad With Tomatoes

Spring has sprung! I love the seasons - all of them, including winter - and I get truly excited when a new season is making its appearance. Our neighborhood is coming alive with cherry blossoms, the weather is warming up, and even more exciting, the sun is rising well before my high-schooler leaves for the bus! I think I miss the sun more than anything else during the winter months.


Today, the kids had half-days at school and Andy took the day off. The weather was warm, clear, and beautiful, and it just felt like a Saturday. It only seemed right that we should cook out, so Andy fired up the grill and cooked ribs and hot dogs that we had stored in the freezer. My standard "go to" sides for cookouts are baked macaroni and cheese and some variation of potato salad. Today I wanted to do something different, and the thought of a nice, cool, pasta salad just sounded so refreshing and, well, "spring-timey." After a little searching online, I found this recipe from Real Simple. I made just a few little changes, like cutting back on the tomatoes since I have a tomato-hater in the family, adding some green onion, and using Romano cheese instead of Parmesan.  It turned out to be the perfect side dish for our cookout, and my tomato-hater was able to easily remove the offensive fruit from his portion.

Just a little note. This recipe makes a lot of pasta salad. It was way too much for our family of 5, so I will probably take some leftovers to my grown daughter Whitney - and we'll also be eating it here for a few days. Which isn't necessarily a bad thing. 


PASTA SALAD WITH TOMATOES

12 ounces whole-wheat mini shell pasta

1 pint cherry tomatoes, quartered

5 green onions, sliced

4 ounces Romano cheese, crumbled into small pieces with a fork

1/4 cup extra virgin olive oil

1 1/2 teaspoons salt

1/2 teaspoon pepper

1 teaspoon dried chives

1. Cook pasta according to package directions; drain and immediately immerse in an ice bath to cool. Drain again and set aside.

2. Combine olive oil, salt, pepper, and green onions in a large bowl. Add cooled pasta and mix well to coat. Gently toss with cherry tomatoes and Romano cheese.

3. Chill for 1-2 hours before serving. 


Tuesday, December 17, 2013

Tex-Mex Farmhouse Chicken


One of my favorite recipes to make is Farmhouse Chicken from Tammy's Recipes. I make it regularly for dinner, since everyone in the family loves it, and it's super easy to throw together. But Texas girl that I am, of course I had to think of how I could add a Tex-Mex twist to it. Not to take its place, because we all love the original and I will continue to make it, but just for something... different. I had visions of cornbread, cumin, and peppers dancing in my head, and here is what I came up with.

Main ingredients: Cornbread stuffing mix, butter, corn, green chilies, jalapeno, green onions, yellow onion, chicken, cilantro.

Only spices needed: salt, pepper, and cumin!

After preparing stuffing on the stovetop, mix in corn, green chilies, jalapeno, green onions, cilantro, and cumin.


 Make a basic white sauce with cubed chicken and diced onion, and pour into casserole dish...


TIP for making white sauce with chicken: Cube raw chicken breasts while partially frozen - it makes the job so easy!

Spoon stuffing mix on top and bake.


Yum! Southwest stuffing with a creamy chicken gravy!


 Ingredients:
  • 1 package (12 ounces) cornbread stuffing mix
  • 4 tablespoons butter
  • 4 tablespoons flour
  • 1 small yellow onion, chopped
  • 2 cups milk
  • 2 boneless, skinless chicken breasts, cubed
  • 1 can (7 ounces) chopped green chilies, undrained
  • 2 green onions, thinly sliced
  • 1 jalapeno pepper, seeded and diced
  • 1 can (16 ounces) corn, drained, or 2 cups frozen corn, thawed and rinsed
  • 1/2 teaspoon cumin
  • 1/2 cup chopped fresh cilantro
  • 1/4 teaspoon salt
  • 1/4 teaspoon pepper 
  •  
Directions: 

1. Heat oven to 350 degrees and butter a 2-quart casserole dish.

2. Prepare stuffing mix according to package directions for the stove top. Stir in chopped green chilies, sliced green onions, chopped jalapeno, corn, cumin, and chopped cilantro. Set aside.

3. Melt butter in a medium saucepan and add the chopped yellow onion. Cook and stir over medium-high heat for 3 minutes. Add flour, reduce heat to medium, and cook and stir for 1 minute. Slowly whisk in milk and stir until well-combined. Add cubed chicken, salt and pepper. Bring to a slow boil; reduce heat, cover, and simmer for about 10 minutes, stirring occasionally.

5. Pour chicken mixture into prepared dish. Top with stuffing. Bake uncovered for 30-35 minutes, until lightly browned and bubbly around edges.

Tuesday, October 29, 2013

How to Make Restaurant-Style Salsa


One of my favorite snacks is salsa with crispy tortilla chips. I usually have some salsa made up in the fridge at any given time, and if not, I usually have the ingredients on hand to whip some up. If you've never made your own salsa before, I'm going to show you how.  I call this "restaurant style" because Mexican restaurants always have good salsa - they make it fresh right there at the restaurant! You just can't buy anything like it in a store. And it's so easy, once you make your own, you'll never go back to buying it in a jar.

What you will need:

1 can (14.5 oz.) diced tomatoes (regular, or fire-roasted)
1 can (4 oz.) green chilies
1 small can (8 oz.) tomato sauce
1 clove garlic, peeled
1/2 sweet yellow onion
1 or 2 jalapeno peppers
1 ripe tomato
1 teaspoon Kosher salt
1 teaspoon sugar
Pepper, to taste
Dash ground cumin
1 "handful" fresh cilantro

First, give your cilantro a bath by immersing in a bowl of cool water. Allow to sit in the water while you prepare your other ingredients.


Then transfer to a strainer and rinse with cool water.


Now place your garlic alone in the food processor and chop into tiny pieces.


Chop your tomato into chunks, and dice your jalapeno by first slicing longways into slender "sticks," then slice horizontally. Even though I will be putting my jalapeno into the food processor, I always dice it first, just to be sure we don't get any large chunks of jalapeno left in the salsa.


We like our salsa hot, so I do not remove the seeds from the jalapeno. I also try to pick out a nice, hot jalapeno to use. You can tell this one is hot because of the little white lines running up and down the pepper. If you like a mild salsa, pick out a bright green jalapeno with no white lines. Remove the seeds by cutting the jalapeno in half vertically, then use a spoon to scrape out the seeds and some of the pulp (which is also hot). Then you can enjoy the flavor of the jalapeno without the heat.


Now put your tomatoes and jalapenos into the food processor with the garlic.


I forgot to put sugar in my picture of the ingredients. Sugar isn't necessary if you are using a very ripe, naturally sweet tomato (say, from the farmer's market, or your garden) - but most tomatoes I buy from the store need a little help.


 Add the canned tomatoes, green chilies, tomato sauce, salt, pepper, cumin, and sugar. Whir in food processor for about 30 seconds, until all ingredients are well-blended.


Now add the cilantro and pulse every few seconds, until cilantro is chopped and mixed well. Note: be sure to use the pulse feature for this step, which keeps the salsa from getting too watery.


After the cilantro has been chopped and blended, dice your half onion by hand. Transfer the salsa into a serving bowl and stir in the diced onion. I have learned not to use the food processor with the onion, as it will make the salsa too watery.


Give it a good stir, and it is ready to eat!


Our favorite tortilla chips are Juanita's brand. Oh so good!

Just like a Mexican restaurant. :)  Cover tightly and it will keep for a week in the fridge, if it doesn't get eaten up before then. I like to keep mine in a Mason jar.

 The aftermath. Time to clean up!